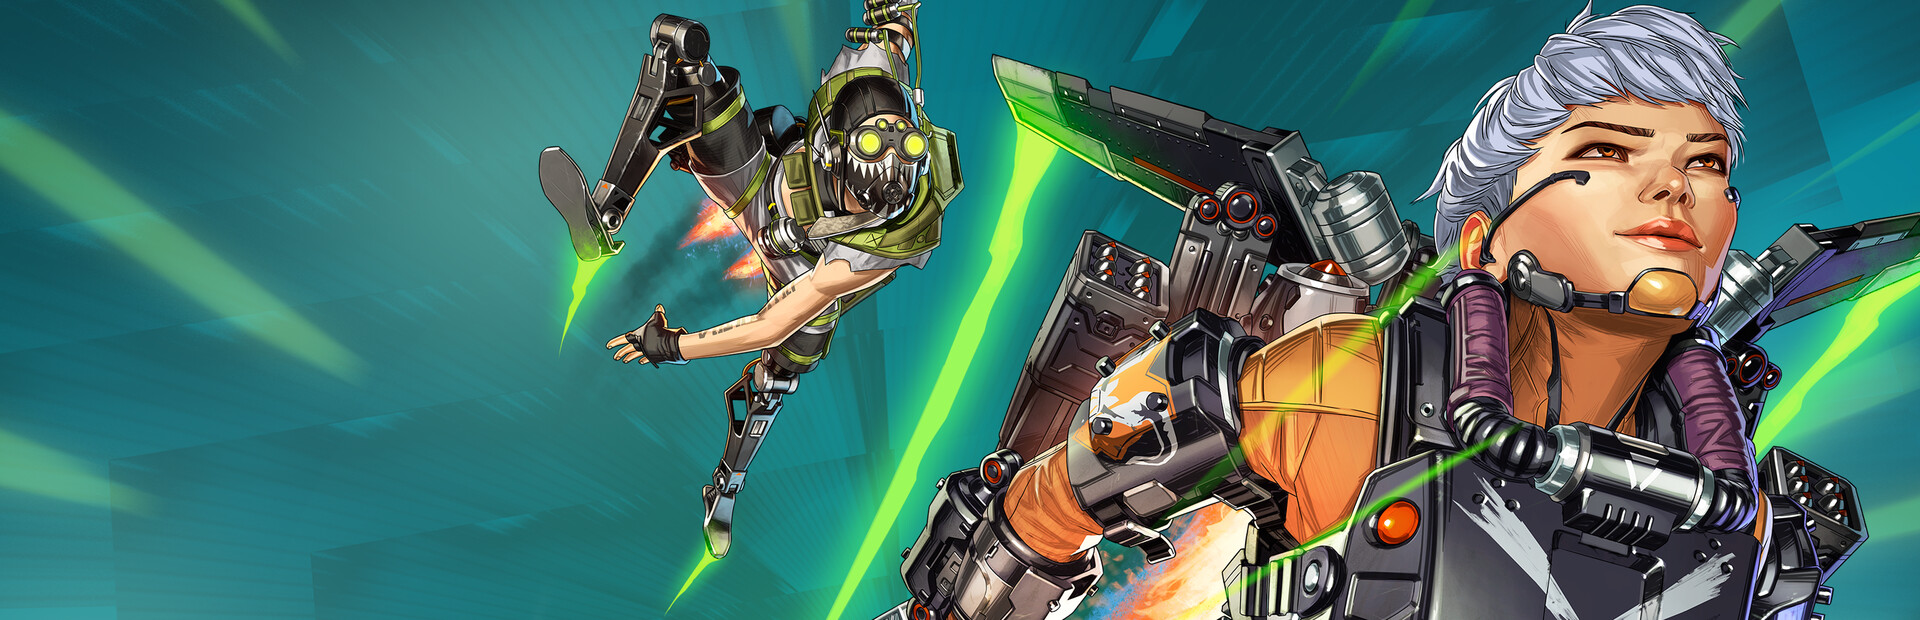
 FPS / Shooter
Apex Movement From Zero to Slide-Hopping: The Core Techniques
What You'll Be Able to Do After This — And the Mental Model to Throw Away
By the time you finish reading, you should be able to do five concrete things that you probably cannot reliably do today.
- Leave cover, cross open ground that an enemy is actively watching, and arrive on the other side without ever presenting them a full-speed standing silhouette for more than a fraction of a second.
- Slide-hop continuously across flat ground for ten seconds or more without bleeding noticeable speed, including along a path that bends.
- Redirect your momentum in midair so you land somewhere their crosshair is not, including sharp turns in the 90 to 180 degree range that ordinary air-strafing will never produce.
- Treat walls, ziplines, and mantle-able edges as sources of speed rather than as obstacles you have to slow down around.
- Diagnose yourself mid-fight: feel whether you are gaining or losing speed, and correct it on the next hop instead of after you are dead.
The mental model most players bring to Apex movement is wrong in one specific way, and that wrongness is exactly why they plateau. They treat movement as a menu. There is the slide-hop, there is the air strafe, there is the tap-strafe, there is the wall jump, and "learning movement" means collecting those tricks the way you collect skins, then remembering which buttons produce which animation.
That model predicts nothing. It cannot tell you why sliding down a gentle hill makes you faster than sprinting, why your air strafe sometimes gains and sometimes does nothing, or why a teammate doing visibly identical inputs keeps pace and you do not. It leaves you unable to improvise, because every situation has to match a pattern you memorized.
The model you actually want is much smaller. Your legend has a horizontal velocity vector, and there is essentially one thing worth caring about: its magnitude. Every meaningful technique is either (a) a way to avoid losing that magnitude, or (b) a way to add a small amount to it. There is no third category. There are two ways you lose speed and one way you gain it, and once you internalize those three facts, the trick list stops being a list and starts being obvious.
The Two Ways You Lose Speed and the One Way You Gain It
Loss one: ground friction on your running state. Whenever your legend is planted on a walkable surface and not sliding, the engine applies friction to your horizontal velocity every simulation step. While you are sprinting this does not feel like friction, because your ground acceleration is pushing you back up to your sprint cap at the same rate friction pulls you down. You only notice it when you are above your sprint cap, which happens after a downhill slide, a wall boost, or certain legend abilities. Excess speed above that cap decays back toward normal sprint over something like a second or so, faster than you expect. This is why an enormous slide down a hill is worthless if you immediately stand up and run in a straight line on the flat — you will give back most of what gravity handed you.
Loss two: bad transitions. Every landing where you were not already holding crouch to slide, every mantle whose exit animation plants you, every collision with geometry you were not lined up with, every accidental bump into a teammate costs speed. Most of these are input-timing failures rather than route failures. The classic is landing from a hop and taking one normal running step before starting the next slide. That single step can cost more than two bad air strafes gain.
The only gain: air acceleration, which is far narrower than you think. Apex runs on a heavily modified Source-derived engine, and it inherits the Source air-acceleration rule. Your input direction defines a "wish direction" vector in the horizontal plane. The engine does not simply add acceleration along that direction. It looks at how much of your current velocity already points along the wish direction, and it can only add up to a small effective cap. Concretely: the useful addition is limited by how much of your speed is not already heading that way.
Two consequences follow immediately, and they explain nearly all air-strafe confusion:
- Pressing forward in the air does almost nothing. If you are traveling hundreds of units per second roughly along your view direction, the projection of your velocity onto the wish direction already exceeds the cap, so there is nothing left to add. This is why players say "never hold W in the air." It is not superstition; it is a direct consequence of the projection rule.
- You gain speed by holding a single strafe key and turning smoothly in the same direction. Turning rotates the wish direction away from your velocity vector, which keeps alive the perpendicular component doing the actual work. The obvious corollary: turning too fast overshoots. Once your view swings far enough that your velocity starts pointing along the new wish direction, you are back inside the cap and the gain stops. The motion that maximizes gain is therefore slow, continuous, single-direction mouse movement matched to one held strafe key, not a twitch.
And here is the part that makes the loop work: while you are airborne, nothing removes your horizontal velocity. Not friction, not air resistance. You keep whatever you launched with. So airtime is free distance at your launch speed, plus whatever small amount clean strafing added. That's it — that's the engine room. Everything else is packaging.

Reference Values and Input Sequences
A warning that matters more than the numbers themselves: every value below is an observed community approximation, not a permanent constant. Respawn has retuned slide durations, the slide gate, and fatigue limits across seasons. Read this table for the relationships — which windows are tight, which are generous, which effects are large and which are marginal — not as values you defend in an argument.
| Item | Input sequence | Rough window / value | Effect on velocity |
|---|---|---|---|
| Holstered sprint vs weapon-out sprint | Toggle weapon away before rotating | Noticeably faster, high single-digit percent range | Free speed on every rotation; compounds over a long push |
| Sprint-before-slide gate | Sprint roughly half a second to a second from a standstill | Short but nonzero | You cannot slide out of a dead stop; if you were stopped, take two steps first |
| Slide duration | Hold crouch while sprinting | Roughly 1-2 s; longer entering at higher speed and on downslopes | Low-friction period; plan your jump near the end |
| Slide friction vs running friction | Slide on flat ground | Several times lower than running | This is why slides preserve speed at all |
| Slide-hop | Sprint, hold crouch, then jump near the end of the slide | Jump within the last fraction of a second before the slide ends | Preserves momentum and refreshes your ability to enter another slide immediately |
| Landing into slide | Hold crouch continuously through the landing | Input must already be held at the contact frame | Skips the running step that would otherwise cost you speed |
| Air strafe (single direction) | Hold A or D alone, turn the smooth same way | Continuous, tens of degrees per second of view rotation | Small positive gain per hop when clean; negative if you over-turn |
| Practical redirect in one air phase | Clean single-direction strafe | Tens of degrees, roughly 30-60 | Enough to change which side of a rock you land behind |
| Tap-strafe redirect | Bind movement input to scroll wheel, then scroll during the air phase | Can approach a 180 degree turn in under a second | The sharpest turn available without touching geometry |
| Wall boost | Approach at an angle, jump before contact, then jump again on contact | Very tight second input window | Can restore or exceed your entry speed |
| Wall fatigue | Consecutive wall contacts without touching ground | Roughly three before further contact gives nothing | Plan your final jump to end somewhere defensible |
| Zipline super-jump | Ride to near the end, then press jump and crouch together, repeatably if needed | Near the terminal of the line | Converts a predictable ride into height plus an unpredictable exit |
Two things to note about the trick everyone reaches for first. Tap-strafing exists because of how scroll-wheel inputs are delivered: a wheel tick issues a rapid press of a movement key, and each of those presses lets you change your effective wish direction far faster than a human can move a mouse. It is effectively keyboard-only territory; controllers do not have that input mechanism, and players on sticks should invest in air strafing and wall reads instead of mourning it. Second, none of these techniques produce enormous speed gains. The gains are small. The reason they matter is that the losses are large, and good movement is mostly about not paying them.
Scenario Walkthroughs
What follows is not "trick, then trick, then trick." Each scenario is a decision sequence, because that is what you actually execute in a live game.
Scenario: crossing open ground with a sniper covering it (zoomed player on high ground, you need the other side)
Your choices here are not "do the fancy thing" and "do the boring thing." They are about which parts of your silhouette spend how long in their line of sight.
- Before you move, decide your cover and your landing, not just your destination. Most deaths on a crossing happen at the end, because players aim at the place they expect you to arrive and stop.
- Holster your weapon and build full sprint behind cover. You want maximum entry speed into your first slide, and entering a slide at low speed gives you a short slide.
- Step out already sprinting, then immediately enter a slide-hop cycle. Slide, jump near the end of the slide, hold the appropriate strafe key in the air, and — critically — alternate your air-strafe direction between hops so your path is not a straight line. A predictable arc is nearly as easy to hit as a straight line.
- Keep your camera forward while strafing sideways. Strafe keys move you relative to where you look; if you turn your view, you turn your movement vector. Looking at the enemy keeps your lateral movement genuinely lateral from their point of view.
- Do not shoot back while crossing unless you are already committed and cannot disengage. Firing slows you and stabilizes your silhouette at exactly the moment you need neither.
- As you approach the far cover, plan one hard redirect on the final hop so that you do not land where their crosshair is resting. If you cannot do a sharp redirect, at minimum vary your hop rhythm so the last hop does not land on the beat you have been keeping.
Scenario: disengaging from a third party through corridors and compounds
The failure mode here is different. You are not crossing; you are trying to break aim and break line of sight as fast as possible.
- Check what you actually need to break. If one wall will block all four angles to you, take it and then reset your slide-hop cycle on the other side. Running in a straight line along a wall you could otherwise put between you just buys you one extra second.
- Use mantle edges rather than going around them. A mantle exit into a slide is one of the few transitions in the game that does not cost you your momentum, and it changes your elevation, which is the hardest thing for a chasing player to read.
- Use walls if you have them: a wall jump that turns a corner converts a chase into a guess. Remember the fatigue limit, though. Your third contact should end somewhere you can actually fight from, because the fourth will give you nothing.
- If you must take damage, take it while airborne and at high lateral speed, not while planted and shooting back. Turn a fight you are losing into pure repositioning.
- Only turn and fight once you have re-established something: a heal, a teammate, or an angle where you are the one initiating.
Scenario: rotating late with the ring closing behind you
The problem here is not aim; it is that you have a distance budget and insufficient time to pay for it politely.
- Take the route with downhill. Every movement guide tells you to use terrain, but the specific reason is this: sliding downhill is the cheapest speed you will ever get, because a slope feeds a component of gravity into your horizontal velocity while slide friction is at its lowest. Uphill costing you speed and downhill paying you is the single biggest routing variable available.
- Do not waste the gift. When your downhill slide ends, you have purchased speed above run cap. Spend it immediately: slide-hop the flat ground that follows rather than running it, because running it is precisely the activity that decays your excess back to normal.
- Holster. Reload later. Every second of rotation with a weapon out is a tax you chose to pay for nothing.
- Use ziplines when they cross terrain you cannot slide, but do not ride them politely. Their problem is not travel time; it is that your body follows a fixed line that anyone with a scope can lead into. Super-jump off the end, or dismount early at the moment your line passes a piece of geometry you can drop behind.
Scenario: taking a fight you have to win now (short range, you initiated)
- Enter at whatever speed you already have; do not slow down to aim. In close quarters, your best protection is that your opponent's crosshair has to travel.
- Slide into the engagement rather than standing into it, because the slide lowers your camera abruptly. Players tracking you will over-correct upward.
- Keep moving through the fight, but deliberately vary direction between shots. Two identical strafes is a rhythm, and rhythms get read.
- Use a single hard redirect if they commit their spray, then take your own shot during the moment their tracking has to reverse.
Drill Progression and Pass Conditions
Do these in the Firing Range with intent, not as a warm-up autopilot. Each drill has a pass condition so you know when to move on.
| Drill | Setup | Volume | Pass condition |
|---|---|---|---|
| Entry slide | Sprint across the range, hold crouch, release at natural slide end | 20 reps, both directions | You enter the slide within roughly a step of deciding to, every time |
| Slide-hop straight line | Same, jumping at the end of each slide | 10 continuous hops across a fixed stretch | You never take a normal running step between hops |
| Landing with crouch held | Random jumps from height | 30 reps | You land into a slide every time without an intermediate plant |
| Air strafe circles | Hop in a large circle holding one strafe key and turning same way | 5 min each direction | You can describe whether each pass gained or lost; ideally you can see it in the FOV/visual feedback |
| Figure eights | Same, alternating turn direction at each end | 5 min | The transition between the two directions does not cost you the whole hop |
| Wall sequence | Pick one wall; practice one, two, then three contacts | Until 10 clean three-contact sequences | You hit the second input within its small window more often than not |
| Variable-rhythm crossing | Cross the range while deliberately varying hop timing | 10 reps | Your rhythm is not predictable to a teammate watching you |
| Tap-strafe redirect | Bind movement to scroll; practice redirecting over a marker on the ground | 10 min daily | You can land facing roughly 180 degrees from your launch heading |
The order matters. Speed is the substrate, so do not touch redirect until your straight-line hop is automatic, and do not touch tap-strafe until your redirect is intentional. Players who learn the sharp turns first build a nervous, twitchy movement style, because they are using a precise tool to solve a problem that was actually about momentum conservation.

Edge Cases That Separate Good From Noticeably Bad Movement
The perpendicular sweet spot is not "more turn is better." Because of the projection rule, your air-strafe gain peaks somewhere near perpendicular and falls off on either side. If you under-turn, you barely activate the useful component. If you over-turn, you swing the wish direction past your velocity and the addition collapses. The practical feel: when you accidentally find optimal air-strafe input, the movement feels almost suspiciously smooth, like you are being pulled along a track. That smoothness is your diagnostic.
Airborne means committed. A generous reading of air control tempts people into thinking they can dodge in midair. You cannot meaningfully brake or change your landing spot late in a jump. Every redirect has to be started early. This is why good players who fight strong airborne players do not try to track them; they aim at the landing and wait. Your counter is not to fly longer, it is to have several plausible landings and pick one late.
Variation beats maximization. There is a ceiling on how fast you can go, and you can hit it while still being readable. Once you are near optimal, further optimization buys you nothing, while varying your rhythm and your path buys you a great deal, because you are attacking their prediction rather than their tracking.
Camera direction governs your movement vector. All of this is relative to where you look. Strafe keys move you relative to your view, so if you want lateral movement relative to an enemy, look at them. If you turn to watch a second threat, understand that you have just changed the direction your "sideways" is.
Server update rate is part of your defense. Apex's server simulation runs at a comparatively low update rate relative to tactical shooters, and there is a well-known practical consequence: very fast lateral movement genuinely degrades how cleanly opponents hit you, above and beyond simply being a harder visual target. This is a real argument for crossing fast rather than cautiously walking behind a smoke. Slow, deliberate exposure is often worse than fast exposure.
Legend abilities add a second velocity source, they do not replace the rules. Grapples, stims, tactical dashes, and gravity effects give you ways to reach speeds the baseline rules would not allow, but everything about preserving what you have still applies. The most common legend-specific mistake is wasting the granted momentum — boosting, then immediately doing something that dumps it.
Crouch input mode matters more than anything in your settings. Use hold-to-crouch, not toggle. Nearly every advanced technique requires knowing whether your crouch key is down at a specific frame, and toggle makes that ambiguous. If you are still on toggle, this single setting is probably costing you more than any other change you could make.
Mistakes and Their Specific Corrections
| Mistake | Why it actually happens | The specific correction |
|---|---|---|
| Losing speed right after a big downhill slide | Standing up and running on the flat decays excess speed back to sprint cap | Spend it: slide-hop the flat immediately, never run it |
| Holding W in the air | Habit from the ground, and nobody explains the projection rule | Air phase uses only A or D; W is a ground key |
| Air strafing with a big flick | Impatience; attempting to rotate the wish direction quickly produces the opposite of what you want | Turn slowly and continuously, at roughly the rate that keeps you near the perpendicular |
| Taking one running step between hops | You press jump and then start the next slide after already landing | Hold crouch through the landing so contact frame already has the slide input |
| Standing up mid-crossing to return fire | Threat response, plus wanting agency | Choose before you leave cover: commit to crossing or commit to fighting. Both half-choices are worse than either full one |
| Practicing in the firing range only on flat ground | It is where most drills are demonstrated | Slopes, edges, and walls are where the speed comes from; make them part of every session |
| Predictable hop rhythm | Efficient movement naturally produces a beat | Deliberately break rhythm when someone is watching you, even at a small speed cost |
| Trying everything at reachable speed | Confusing "possible" with "useful" | In fights, use the simplest movement that achieves the goal; spend your attention on shooting |
Notice that none of these corrections are "practice more." Every one names the specific input, timing, or decision that is wrong.

A Four-Week Practice Plan With Self-Diagnostics
Assume you can commit roughly 20-25 minutes a day in the firing range plus whatever real games you play.
Week 1 — Build the substrate (slide and slide-hop). Days 1-2: only the entry slide, twenty reps in both directions, paying attention to how much sprint you need before the crouch input will even produce a slide. Days 3-5: add the jump at the end of the slide and chain it. Days 6-7: chain it across the range in both directions, then start introducing turns. Pass condition: you can cross a fixed stretch of flat ground with zero running steps and zero loss of apparent speed.
Week 2 — Air strafe. Days 1-2: circles in one direction, five minutes, focusing entirely on the smoothness cue. Days 3-4: circles in the other direction; it will be worse on one side, and that asymmetry is normal and worth fixing deliberately. Days 5-7: figure eights, which force you through the awkward transition. Pass condition: your landings are where you meant to land, and you can tell when a pass gained.
Week 3 — Terrain. Days 1-2: find one hill and learn how long its slide lasts and how much speed it gives you. Days 3-5: one wall, building up to three contacts with a deliberate end position. Days 6-7: chain terrain types — slide down, hop across, wall redirect, slide again. Pass condition: a single continuous route through varied terrain with no obviously wasted transition.
Week 4 — Transfer. Play with intent. Choose one technique per session and use it deliberately in real fights, accepting that you will lose some fights you would otherwise have won. This is not regression; it is the cost of installing a new behavior. By the end of the week, review clips of three deaths and ask a single question about each: did I arrive where I meant to arrive? Most movement deaths are not failures of speed. They are failures of destination.
Self-diagnostics you can run any time:
- Hop count over fixed distance. Pick two landmarks. As your execution improves, the number of hops needed should stabilize and then drop. If it creeps upward, you are losing speed somewhere.
- The first-step test on every landing. Record thirty seconds of hop-cycling and scrub it. Count how many times you take a full running step. This should trend toward zero.
- The camera test. While executing a crossing, check whether you are looking at the threat. If you are looking at your path, your "lateral" movement is not lateral from their point of view.
- The twelve-second test. If you can slide-hop across open ground for roughly twelve seconds without a stumble, the basics are installed. Everything after that is refinement and application.
Closing: Movement Is a Uptime Stat
Strip away the vocabulary and what you have is this: friction removes speed, bad transitions remove more, air preserves whatever you launched with, correct air strafing adds a little, and slopes add a lot. Each technique in this guide is just a different arrangement of those five facts tuned to a different piece of geometry.
The reason this reframing pays off is that it changes what you practice. You stop drilling animations and start drilling transitions, because transitions are where speed actually leaks. And it changes what you do in a fight: you stop asking "what trick do I do here" and start asking "what is the cheapest way to keep what I already have, and where do I need to be in two seconds."
One last framing that helps for players who are impatient with drills: movement is not an aim substitute or a highlight reel, it is an uptime statistic. Better movement means more time spent alive and shooting, less time spent healing behind a rock, more fights entered on your terms. That is the metric. Go count it in your next ten games.
🔥 Topics
Palworld Beginner Mistakes: Six Things You Will Regret in 20 Hours
Next →Echoes of Wisdom Puzzle Method: Think Objects First, Abilities Second
More “Apex Legends” Content
 FPS / Shooter
Apex Legends: Season 5 Update — Everything New and Changed
A complete tour of Apex Legends Season 5 — new legend Loba, the Kings Canyon overhaul, the Charge Tower, and every balance change that shipped on May 12.
 FPS / Shooter
Apex Legends Legend Tier List: Who Carries Ranked in 2026
Season 30's ranked meta rewards mobility and supply control — Loba, Axle, Pathfinder, and Seer sit at the top of the consensus board.