 RPG / Action
Baldur's Gate 3: Act 1 Walkthrough — From the Nautiloid to the Goblin Camp
Baldur's Gate 3 drops you into the middle of a mind flayer kidnapping and never slows down. Act 1 is where your party comes together, your parasite problem begins, and the first great moral fork — the fate of the Emerald Grove — gets decided. This guide condenses the rules you actually need, the companions who will share your journey, and the major story beats from the Nautiloid crash all the way to the Goblin Camp.
Getting Started: Build, Difficulty and the Dice
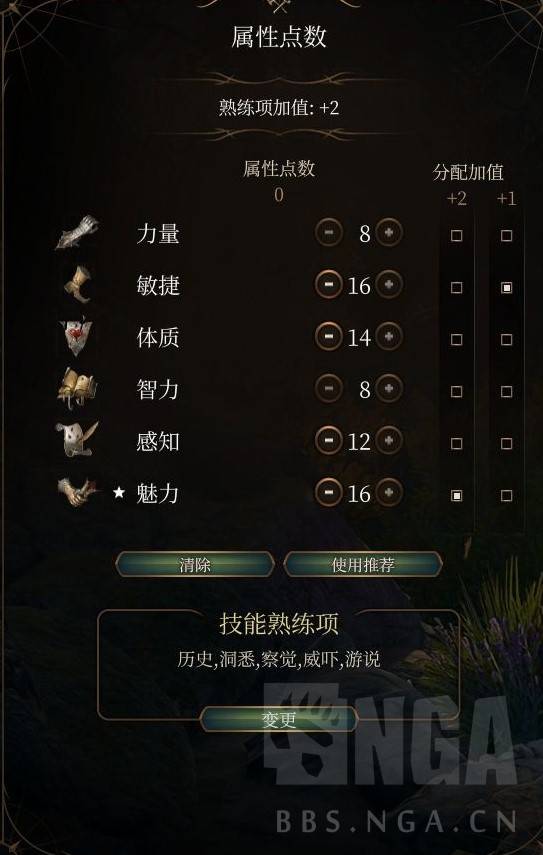
Baldur's Gate 3 runs on the D&D 5e ruleset, and almost everything you do is resolved by a roll. Every character has six ability scores — Strength, Dexterity, Constitution, Intelligence, Wisdom and Charisma — where 10 is the human average. Because your modifier rises by +1 for every two points above 10, the golden rule of character building is "take even numbers, skip odd ones." A high score you actually use beats a spread of mediocre ones.
Most checks are a d20 roll plus your ability modifier, your proficiency bonus (if you are trained in the relevant skill) and any situational bonuses, measured against a Difficulty Class (DC). Rolling a natural 20 is a critical success; a natural 1 is an automatic failure. In dialogue, ability checks decide whether you can persuade, deceive or intimidate your way past a problem, so lean on skills you are proficient in and whose linked attribute is high. Advantage lets you roll twice and keep the higher die; disadvantage forces the lower. Having both cancels out.
Combat adds a few more terms. Your Armour Class (AC) is effectively your dodge score; melee attacks add Strength, ranged add Dexterity, and spell attacks add your casting stat. Landing a hit triggers a separate damage roll. When a creature is reduced to 0 HP it falls prone and must make death saving throws — three successes stabilise it, three failures kill it. Outside battle you can toggle turn-based mode to stack buffs, steal, or reposition safely. Learn the rest system: Short Rests recover half your HP and some resources, while Long Rests at camp restore everything at the cost of camp supplies — and advance the story.
For difficulty, Explorer is the gentlest (weak, dim enemies, but no multiclassing), Balanced is the intended experience, Hardcore toughens enemies and tweaks mechanics, and Honour mode is permadeath with no reloads and new legendary actions for bosses. Custom lets you dial it yourself.
Your Origin Companions
You will meet most of your party within the first hour, and each carries a personal quest tied to the parasite in your skull.
- Astarion is a high-elf vampire spawn and rogue who was snatched from Baldur's Gate by the mind flayers. He hides a cruel past under a charming smile and wants his freedom — and revenge on the vampire who made him.
- Lae'zel is a githyanki fighter, fiercely loyal to her queen Vlaakith, and obsessed with reaching a creche to cure the tadpole before it transforms her.
- Shadowheart is a half-elf cleric of the goddess Shar, sworn to deliver a mysterious artefact to Baldur's Gate. She remembers little of her past and trusts no one, least of all githyanki.
- Gale is a human wizard from Waterdeep and a chosen of the goddess Mystra, carrying a dangerous magical condition that forces him to "eat" magic items.
- Wyll, the "Blade of Frontiers," is a human warlock bound by a pact to the cambion Mizora, hunting the devil Karlach.
- Karlach is a tiefling barbarian who escaped the hells only to discover a ticking infernal engine in her chest.
- The Dark Urge is a fully customisable origin with a buried hunger for bloodshed and a murky, violent past.
Prologue: Escape the Nautiloid
The game opens with a cinematic on the mind flayer flagship: a githyanki warrior is implanted with a tadpole, and then you are next. You wake inside a fleshy pod aboard the crashing ship, your head splitting from the larva now squirming in your brain.
Climb out and explore. A nearby hatching pool can be detonated with a simple Investigation check (DC 10) to fling you onward. Upstairs you meet a talking brain — an Intellect Devourer the party nicknames "Us" — who offers to guide you to the helm. Before long a githyanki woman drops in and presses a blade to your throat; a sudden mental link reveals she is also infected. This is Lae'zel, and she joins you. Together you fight your first battle against imps in the hellish layer of Avernus.
Rescuing Shadowheart is a small puzzle: a dying cultist holds the rune-key to her pod, and you can free her with an Arcana check, brute force, or by commanding the pod open through the tadpole's psychic link. Push on to the main helm where a mind flayer ally bids you activate the neural transmitter within 15 turns or die. Mop up the imps and the hellish boar, optionally disarm the cambion commander Zhalk (a Command spell can make him drop the Flame Blade) for extra XP, then touch the transmitter. The ship lurches through the astral sea and plummets toward Faerûn — your crash landing ends the prologue.
Wrecked on the Beach
You come to on a riverside beach, alive but penniless. The crashed Nautiloid burns nearby, and a farmer's mangled body hints that you are not alone. If you saved Shadowheart she wakes beside you; otherwise she meets you later at the ruined gate.
Follow the shore west to loot the wreck — watch for Intellect Devourers — and grab the Thieves' Tools from a chest. Your first waypoint, the Overgrown Ruins (roughly 276, 297), sits behind a locked door. Before opening it, head northeast to a second waypoint at the Roadside Cliff (223, 327), where a purple portal is spitting arcane energy. Reach in and pull out a stranded hand: this is Gale, who joins once freed.
Return south and you'll trigger Astarion's introduction. The pale elf claims he is fending off a brain-beast, but a Perception check reveals the glint of a dagger — he was about to ambush you, mistaking you for a mind flayer thrall. A Strength check (DC 14) lets you headbutt him off; the misunderstanding clears and he joins. Finally, back at the wreck, finish off the dying mind flayer that has been fishing for control of your mind (a Wisdom save, DC 5, resists its domination). With your core four assembled, head east.
The Overgrown Ruins and the Tiefling Captors
The path east climbs to an abandoned monastery overlooking the ruined village. Ignore the grave-robbers for now and circle north to find Lae'zel — bloodied and trapped in a cage, guarded by two tieflings debating her fate. Use Deception, Persuasion or, if you are a drow feared across the surface, Intimidation to send the tieflings away, then break the cage. Lae'zel, reluctant but grateful, explains her plan: a githyanki creche nearby can purge the tadpole, and a tiefling named Sazza knows the way. She joins your party.
This early stretch teaches the game's social systems. Companions like Gale, Shadowheart and Astarion react to your choices — approve or disapprove — which nudges their approval and, eventually, their personal quests. A well-timed Inspiration point, earned by playing to your background, even lets you reroll a failed check. Spend them wisely; you can hold at most four.
The Road Ahead: Blighted Village, the Grove and the Goblin Camp
Beyond the ruins lies the Blighted Village, where you'll first meet Withers (a helpful undead who manages your camp) and learn that a tiefling refuge — the Emerald Grove — is under threat from a goblin army. At the Grove you'll parley with the druid leader Zevlor and the tieflings sheltering there, fend off a would-be assassin (the druid Nettie, who fears your parasite), and prepare for the inevitable raid.
The Goblin Camp, meanwhile, is where the threat originates. Three leaders answer to the cult of the Absolute: the ogreish Priestess Gut, the hobgoblin Ragzlin, and the drow warlord Minthara. The druid Halsin is imprisoned there. The act's defining choice arrives here: defend the Emerald Grove and wipe out the camp, or betray the tieflings and raid the Grove alongside the goblins. Freeing Halsin and killing the three leaders secures the region; siding with Minthara opens a darker path but still progresses the story. Either way, the Grove and the camp cannot both stand.
Side Paths and First Major Choices
Act 1 is dense with optional threads. Auntie Ethel lurks at her teahouse with a cure that comes at a price (the Mayrina quest). The Underdark and the Mountain Pass both offer alternate routes into Act 2 — and the Mountain Pass leads to the githyanki Creche Lae'zel craves, a brutal trial that may or may not cure the parasite. You can also befriend the Owlbear cub, adopt the dog Scratch, and uncover Waukeen's Rest. Whatever you do, resolve the Grove or Goblin conflict (or deliberately skip it) before crossing into the Shadow-Cursed Lands, because Act 1's choices echo all the way to the finale.
🏷️ Related Tags
Apex Legends: Season 5 Update — Everything New and Changed
Next →Baldur's Gate 3: Act 2 Walkthrough — Shadow-Cursed Lands and Moonrise Towers
More “Baldur's Gate 3” Content
 RPG / Action
Baldur's Gate 3: Act 2 Walkthrough — Shadow-Cursed Lands and Moonrise Towers
Act 2 of Baldur's Gate 3 strands you in the Shadow-Cursed Lands, where the fate of Last Light Inn and the secret of the Nightsong decide the fall of Moonrise Towers.
 RPG / Action
Baldur's Gate 3: Act 3 Walkthrough — Baldur's Gate and the Final Battle
Act 3 of Baldur's Gate 3 takes you into the city itself: the Steel Watch, Gortash, Orin the Red, the three Netherstones and the final battle against the Netherbrain.
 RPG / Action
Baldur's Gate 3: Ice Sorlock Build — Frostbite Draconic Sorcerer / Warlock
A Patch 8 frost Sorlock for Baldur's Gate 3: a Draconic Sorcerer core with a Warlock dip, built around Ray of Frost, the Wet condition, and Charisma-scaled elemental damage.
 RPG / Action
Baldur's Gate 3 Companion Builds: Classes, Subclasses, and Party Synergy
Baldur's Gate 3 party power is an action economy and spell save DC problem long before it is a damage dice problem, and every companion can be fully respecced. This guide covers the 5e numbers behind the build decisions, the class breakpoints that matter at the level 12 cap, four complete companion builds with level-by-level choices, and a party synergy matrix.