 RPG / Action
Baldur's Gate 3: Act 2 Walkthrough — Shadow-Cursed Lands and Moonrise Towers
Act 2 strands you in the Shadow-Cursed Lands, a realm of magical darkness where only light keeps the shadows — and the things in them — at bay. This is the act of Moonrise Towers, the unkillable tyrant Ketheric Thorm, and the secret of the Nightsong that binds him. Here is how to cross the curse, hold the line at Last Light Inn, and bring down Moonrise.
Crossing into the Shadow-Cursed Lands
You enter Act 2 either through the Mountain Pass or the Underdark, both funnelling you into the cursed wastes west of Moonrise. The shadow curse drains your health the moment you leave a lit area, so you need a reliable light source: a Moonlantern, carried by the drider Kar'niss and his patrol, or a pixie captured inside one. Follow the winding path and you'll witness a confrontation with the drider; spare or slay him, but take the lantern regardless.
The land itself is hostile. Shadow-cursed beasts ambush the unwary, and the dark visibly recoils from your light — keep your party clustered and never send a scout beyond the lantern's glow. Balthazar, a polite necromancer in service to Ketheric, also crosses your path here and hints at the towers' grim purpose. Scattered settlements test you with moral puzzles long before the siege: the ruined town of Reithwin, the House of Healing, and a fallen Sharran temple. Loot what you can and learn the rhythm of the curse, because Act 2 rewards patience and preparation over a reckless rush.
One practical decision early on is how to light your way. A Moonlantern is reliable but its trapped pixie slowly loses health, while freeing the pixie into your own lantern grants the same protection with none of the cruelty. Patrols of cursed soldiers roam the roads, so approach every encounter from the shadows and use turn-based mode to scout. The safer you cross, the more resources you'll have for Moonrise.
Reithwin Town and Lifting the Curse
The abandoned town of Reithwin sits at the edge of the darkness, its fountain and homes frozen under the curse. Here you'll meet the half-shadow-cursed man Thaniel and, deeper in, the eerie boy Oliver. Reuniting Thaniel with his lost self is the key to lifting part of the curse over Reithwin and restores a measure of safety to the region.
This thread doubles as a quiet character moment and a practical one: easing the curse opens shortcuts and removes environmental damage in later exploration. It also ties directly to Last Light Inn, since the inn's survival and the land's healing are two halves of the same struggle against Ketheric's dead god.
Last Light Inn and Isobel
The only safe haven is Last Light Inn, lit by the cleric Isobel's protective aura of Selûne. Inside you reconnect with Jaheira, the Harpers, and many of the tieflings you saved — or failed — in Act 1. Isobel is the act's quiet keystone: the cultist Marcus is sent to kidnap her, and if you fail to protect her the inn's light dies and its inhabitants are lost to shadows.
Keep her alive at all costs. Post a sturdy companion nearby and intervene the instant Marcus strikes; a successful defence preserves both the inn and a vital ally for the battles ahead. While you're there, take the Harper and tiefling quests — scouting the towers, rescuing captured allies, and choosing how brutally to deal with the cultists who wander in. These small decisions build the army you'll need for the Moonrise assault.
The Mason's Guild and Approaching Moonrise
South of the inn, the Mason's Guild hideout offers a safer, stealthier infiltration route into Moonrise Towers, solved with a small logic puzzle and a little creeping. From there the towers rise black against the sky: Ketheric Thorm's fortress, headquarters of the cult of the Absolute and holding hundreds of prisoners in its dungeons.
You can march through the front gate or slip in via the guild — the choice shapes how much resistance you face. Either way, scout the perimeter first. The towers are layered with fanatical cultists, the occasional merchant happy to sell you gear before the slaughter, and the same totalitarian discipline that marks every Absolute stronghold.
Moonrise Towers: Ketheric and the Prisoners
Ketheric receives you coldly but permits your entry; he senses the tadpole and assumes you serve the Absolute. Below, the dungeons hold the gnome artificer Barcus and the captive tieflings, plus the druid Halsin if you failed to free him earlier. You can liberate them openly or quietly, and the choice ripples into the final fight.
This is also where Shadowheart's arc sharpens. The path to the Nightsong runs through the Gauntlet of Shar beneath the towers: a deadly trial of faith — the soft-step trial, the self-same trial, and the spear of Night — that ends at Dame Aylin's prison. Ketheric's aide Balthazar is charged with keeping the Nightsong contained, and the House of Healing, ruled by the deranged surgeon Malus Thorm, guards the approach. Loot what you can and decide whether to spark a prison revolt now or save it for the assault.
The Nightsong and Shadowheart's Choice
The act's moral centrepiece waits in the Shadowfell beneath the towers: Dame Aylin, the immortal daughter of Selûne, held captive as the Nightsong. So long as she lives, Ketheric cannot truly die. Shadowheart is commanded by her goddess Shar to kill Aylin and claim eternal power; freeing her instead breaks Ketheric's immortality and turns Shadowheart toward Selûne.
This single decision reshapes your ending, your companion, and the final battle. If Shadowheart strikes Aylin down she grows in Shar's favour but loses her chance at a self-determined life; if she frees Aylin she abandons Shar, spares a fellow prisoner of fate, and becomes a cleric of the moon. Talk to Shadowheart before the deed, since her approval and your words tip the balance, and the choice cannot be undone.
The Battle for Moonrise and the Colony
With Aylin freed or dead, assault Moonrise. Ketheric falls in two phases: first on the battlements, then again below in the Mind Flayer Colony, where he is bound to a partially-formed elder brain. Clear the colony — watch for the undead Mystic Carrion and the necrotic traps — and claim the Astral Prism clue that points to Prince Orpheus.
If you freed the prisoners earlier, a full uprising can overwhelm the towers from within, turning a boss fight into a liberation. Rescuing the prisoners and toppling Ketheric ends Act 2 and matures your parasite toward its final crisis, while the colony's horrors foreshadow the Netherbrain waiting in Act 3.
Key Choices and Consequences
Act 2 rewards subtlety. Freeing the prisoners can trigger a full uprising that overwhelms the towers; siding with the cultists dooms the tieflings you fought for in Act 1. Shadowheart's Nightsong choice is irreversible and defines her loyalty for the rest of the game, and Thaniel's quest quietly cleanses the land you leave behind.
If you are the Dark Urge, the killer Sarevok and the whispers of Bhaal grow louder here, setting up Act 3's reckoning. Leave Moonrise only when the colony is cleared and your path to Baldur's Gate is open — the final act will not wait.
Above all, treat Act 2 as the hinge of the whole story. The companions you befriend, the tieflings you spare, and the goddess Shadowheart ultimately serves all converge here. The tower may fall in an afternoon, but its consequences echo into the epilogue, so play it the way you want to be remembered.
🏷️ Related Tags
Baldur's Gate 3: Act 1 Walkthrough — From the Nautiloid to the Goblin Camp
Next →Baldur's Gate 3: Act 3 Walkthrough — Baldur's Gate and the Final Battle
More “Baldur's Gate 3” Content
 RPG / Action
Baldur's Gate 3: Act 1 Walkthrough — From the Nautiloid to the Goblin Camp
Act 1 of Baldur's Gate 3 covers the Nautiloid crash, the Emerald Grove, the Goblin Camp and the first major choices that shape your run.
 RPG / Action
Baldur's Gate 3: Act 3 Walkthrough — Baldur's Gate and the Final Battle
Act 3 of Baldur's Gate 3 takes you into the city itself: the Steel Watch, Gortash, Orin the Red, the three Netherstones and the final battle against the Netherbrain.
 RPG / Action
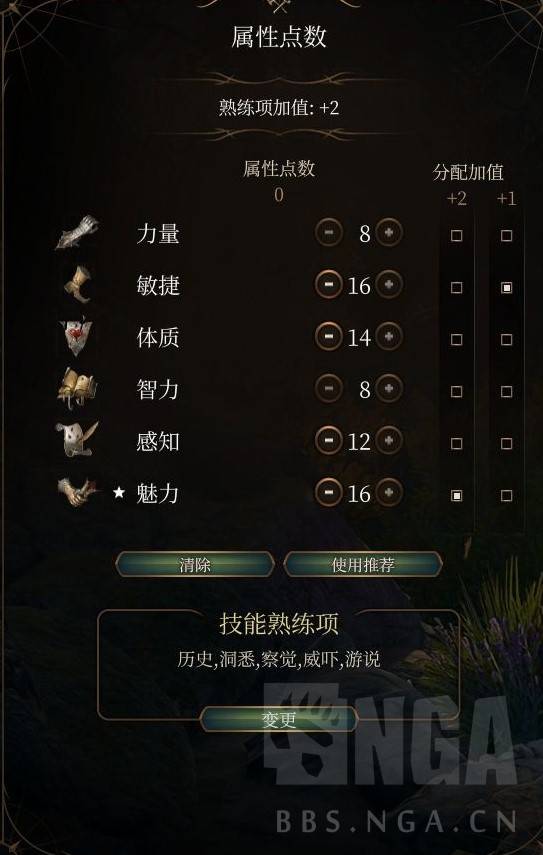
Baldur's Gate 3: Ice Sorlock Build — Frostbite Draconic Sorcerer / Warlock
A Patch 8 frost Sorlock for Baldur's Gate 3: a Draconic Sorcerer core with a Warlock dip, built around Ray of Frost, the Wet condition, and Charisma-scaled elemental damage.
 RPG / Action
Baldur's Gate 3 Companion Builds: Classes, Subclasses, and Party Synergy
Baldur's Gate 3 party power is an action economy and spell save DC problem long before it is a damage dice problem, and every companion can be fully respecced. This guide covers the 5e numbers behind the build decisions, the class breakpoints that matter at the level 12 cap, four complete companion builds with level-by-level choices, and a party synergy matrix.