 Open World
Ghost of Tsushima Stealth: The Ghost Playstyle and Silent Takedowns
Becoming the Ghost
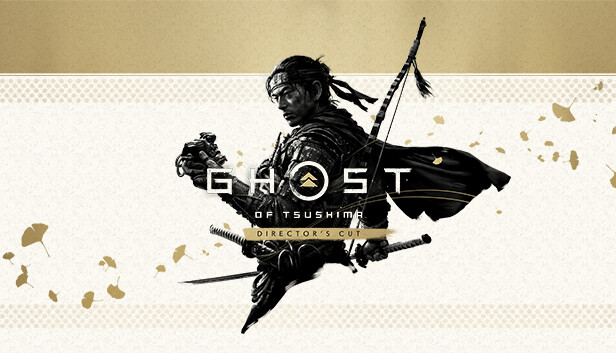
Jin Sakai begins as a samurai bound by honor, but Tsushima's invasion forces a second identity: the Ghost. Where open combat is glorious, stealth is efficient, and the Ghost playstyle rewards patience, positioning, and the disciplined use of tools over brute force. The core idea is to thin a camp before a single sword is drawn, removing enemies one silent kill at a time until the survivors either flee or fall in a controlled fight. This approach is not a pacifist alternative; it is often the fastest and safest way to handle the game's many fortified camps, especially on higher difficulties where being surrounded is deadly.
The foundation is concealment. Tall pampas grass and dense bushes render Jin nearly invisible at close range, and a white outline tells you when you are hidden. Always crouch when approaching enemy territory to cut your visibility and footstep noise, and use the listen ability to highlight patrols through walls so you can plot a route around them. Stealth in this game is about reading movement, not twitch reflexes.
The Silent Takedown Toolkit
Every stealth run rests on a few core moves. The basic stealth kill drops an unsuspecting enemy from behind in a single motion. Chain Assassination, available early and upgradeable, lets Jin eliminate a second and then a third clustered foe in quick succession, which can erase entire groups before an alarm sounds. Assassination from above uses rooftops and ledges for devastating drops onto isolated targets or leaders, changing your approach angle entirely. The table below summarizes the primary takedown tools and when to use each.
| Technique | Best Used When | Upgrade Note |
|---|---|---|
| Stealth Kill | Lone guard in grass | Always available |
| Chain Assassination | Two to three clustered foes | Upgrades add a third target |
| Assassination from Above | Elevated, isolated target | Great for camp leaders |
| Smoke Assassination | Mid-fight, enemies blinded | Pairs with Ghost Armor |
Mastering these three lets a patient player clear camps without ever triggering a stand-up brawl.
Ghost Weapons and Distractions
Jin's Ghost arsenal is what separates him from a ordinary assassin. Kunai are thrown blades that stagger or kill weaker enemies from range, creating openings or finishing what a takedown started; upgraded, they can drop standard foes outright. Smoke bombs are the signature panic button: a thrown cloud blinds enemies so you can escape, reposition, or chain-assassinate a cluster that cannot see you. Wind chimes and similar lures draw guards to a spot, letting you isolate and pick them off. Sticky and black-powder bombs handle groups when stealth breaks, though they are loud and best saved for emergencies.
Distraction is the quiet art of the Ghost. Toss a chime, watch a guard investigate, then slip behind for a free kill. Combined with Focused Hearing, which marks enemies through walls, you can map an entire camp's patrol logic before setting foot inside it. Archers should be your first targets because they spot you faster than ground troops and can ruin a stealth approach from afar.
Armor, Charms, and the Terror Meter
Gear choices multiply your stealth. The Ghost Armor, earned in the mid game, reduces how quickly enemies detect you and raises the resolve gained from stealth kills, making it the natural choice for this playstyle. Earlier, the Ronin Attire offers a milder detection reduction that helps newcomers. Charms refine the build further: one reduces enemy detection speed, another widens the window for chain assassinations, and others boost stealth damage or resource gains. Stacking charms that reinforce the same goal creates a specialized, near-invisible predator.
Terror is the psychological capstone. As Jin kills without being seen, a terror meter builds, and once it is high enough, activating the Ghost stance can send enemies fleeing in fear, making subsequent encounters trivial. A fully specced stealth build can clear entire camps and never draw a blade in open combat, which is exactly the fantasy the game sells. The table below lists gear priorities for a Ghost-focused loadout.
| Slot | Recommendation | Effect |
|---|---|---|
| Armor | Ghost Armor | Lower detection, more resolve |
| Early armor | Ronin Attire | Mild detection reduction |
| Charm | Hidden Sight | Slower enemy detection |
| Charm | Silent Death | Wider chain-assassination window |
| Charm | Inari | More gathering for upgrades |
A Camp Clearing Routine
A reliable routine beats raw talent. Approach from the grass line, use Focused Hearing to tag every patrol, and eliminate archers first. Lure isolated guards with wind chimes, then chain-assassinate any clusters you cannot separate. Save smoke bombs for when a plan goes wrong, and keep kunai for the enemy that refuses to leave cover. When half the camp is silent, you can either finish the rest stealthily or switch to direct combat with the advantage already won. This hybrid of quiet openings and clean finishes works at every difficulty.

Building Toward the Endgame Ghost
Technique points are scarce early, so focus on one combat approach and one stealth approach before spreading out. Chain Assassination and Focused Hearing are the two stealth picks that pay off immediately and keep paying off for the whole game. Upgrade your Ghost weapons when you can, since a bigger kunai capacity and longer smoke duration directly extend your silent reach. Mythic Tales reward unique techniques and armor, so pursue them not just for story but for the tools they grant.
The Ghost playstyle is ultimately about choice. Tsushima lets you weigh honor against survival in every encounter, and the stealth toolkit is the game's answer to overwhelming odds. Learn the grass, master the chain, and let terror do the rest.
Closing Thought
The Mongols may fear the blade, but they are terrified of the Ghost. By pairing concealment, chain assassinations, and a well-upgraded Ghost arsenal, you turn fortified camps into silent graveyards and keep Jin alive when open combat would bury him. Stealth in Ghost of Tsushima is not a side option; it is the most expressive way to play the island's liberator.
The Standoff: Free Kills Before the First Arrow
The standoff is the most under-used tool in the stealth kit, largely because it looks like an honour duel rather than a stealth opener. Initiate it before you are detected and it converts an approaching group into corpses with no alarm, and each upgrade tier adds another target to the chain.
The condition for using it well is positional. A standoff works when you stand in the open where enemies will walk up to you — usually the camp entrance or a courtyard you have not been seen in — and it stops working the moment anyone has already spotted you, because the challenge depends on the group approaching rather than attacking. It is an opening move, not a recovery move, which is why you should plan which cluster to greet rather than killing whoever is nearest.
Targets matter more than timing. Standard troops extend the chain; heavier enemies break it and are better handled by a takedown or left for last. Count the group before committing: a standoff into one or two enemies wastes a cooldown worth four later, while one into a cluster of four is the most efficient action in the camp.
The payoff is not only the bodies. These kills feed the terror meter like any other silent kill, and survivors who watched their companions cut down are likelier to hesitate or run, which softens the rest of the camp before you draw the blade at all.
Kill Order: Who Dies First and Why
Archers first is the rule most players learn, and it is correct but incomplete. The real rule behind it is: whoever can turn one kill into an alarm dies first. Rank the camp against that principle instead of memorising a list.
| Priority | Target | Why they go first | If you cannot reach them |
|---|---|---|---|
| 1 | Archers on watchtowers or high ground | They detect you from outside your grass line | Kunai or a bow shot from cover |
| 2 | Anyone beside a drum or signal horn | They turn one death into a full camp pull | Take them in passing, even if it breaks your route |
| 3 | Patrols whose paths overlap your route | Overlaps remove your safe windows unnoticed | Wait for the overlap to pass; do not speed up |
| 4 | Isolated guards near grass | Free kills and chain-assassination fuel | Lure them with a chime |
| 5 | Leaders and camp objectives | The point of the camp, but the loudest to reach | Save for last, once the camp is thin |
| 6 | The heaviest enemies | Slow, loud, easy to hear coming | Leave them for the end, or for open combat |
The mistake this ordering prevents is the one that ends most stealth runs: a clean kill followed by a horn, and then a fight you did not choose. Six enemies killed in the wrong order leaves you worse off than three killed in the right order, because in the second case you still own the camp's attention.
Before moving, spend ten seconds on Focused Hearing and trace each patrol to where two paths cross. Those crossings, not the enemy count, decide how long you can stay in the grass.
When Stealth Breaks: The Recovery Protocol
Detection is not a binary state, and treating it as one is why players lose camps they were winning. An enemy who suspects something, a group actively searching, and a camp on full alarm each have a different correct response.
| State | What you see | What to do |
|---|---|---|
| Suspicion | An enemy turns toward you, marker fills slowly | Freeze in cover. Moving confirms you; standing still often lets it expire |
| Searching | Enemies spread out and call out | Break line of sight and relocate to grass, do not engage |
| Detected | Full alarm, enemies converge | Smoke bomb, move, and leave the area entirely |
| Recovering | Alarm fades, patrols resume | Re-enter from a different side and take the first archer again |
The single most important rule: do not attempt a chain assassination while anyone can see you. The chain depends on remaining unseen, and a chain started under observation costs you the animation and guarantees the alarm you were trying to avoid. Retreat first, break the line of sight, then come back.
Smoke is a relocation tool, not a panic button to be thrown where you stand. Throw it, then move to grass on the far side of the cloud, so the enemies you blinded search the wrong place. Ghost Stance is the nuclear version: with resolve banked and three or more enemies on you in the open, it is the fastest way to turn a failed stealth run into a won fight. On one or two enemies it is a waste, and while you still have grass to retreat into it is a waste twice over.
Resolve, Ghost Stance Timing, and a Camp Drill
Resolve is the stealth build's real currency, and Ghost Armor exists mostly to make stealth kills pay more of it. The mistake is spending it the moment it arrives.
Hold enough for one heal at all times: every stealth build eventually eats a hit it did not plan for, and ruined runs are the ones where the last resolve went into a stance instead of a heal. Beyond that reserve, spend on Ghost Stance only when three conditions hold at once — at least three enemies still standing, a fight happening where you cannot use grass, and terror high enough that survivors will break rather than trade evenly.
That third condition is the one players ignore. Ghost Stance at low terror gives you kills; at high terror it gives you a rout, which ends the camp faster and with far less risk. If terror is low, the same resolve is better spent retreating and resuming the silent approach.
To make progress measurable, run a three-attempt drill on one mid-sized camp. Log four numbers each time: kills made while undetected, detection events, total time, and resolve left at the end. The first run is the baseline; the target for the third is zero detection events and a shorter clock, achieved by changing kill order and waiting for patrol overlaps rather than by moving faster. When a camp goes clean with resolve left over, move to a larger one.
🏷️ Related Tags
🔥 Topics
Factorio Early Factory: Ratios, Belts, and Automating Science
Next →Hollow Knight Charm Builds: Notches, Synergies, and Boss Loadouts