 Indie
IndieHades II Early Builds: Boons, Aspects, and Synergy Before the Final God
Understanding Melinoë's Boon-Driven Combat
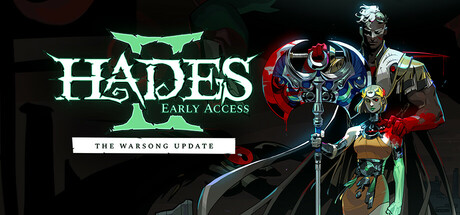
Melinoë, the Princess of the Underworld, steps in as the playable hero of Hades II, and her combat loop leans far more on the Cast and Omega moves than her brother Zagreus ever did. In the current early-access state, nearly every viable run is built backward from which Olympian boons you can chain together rather than from raw weapon choice alone. Each of the six weapons—the Witch's Staff, Sister Blades, Umbral Flames, Moonstone Axe, the Skull, and the Revelry flail—can be reshaped through multiple Aspects that shift the entire feel of a run, but none of them carry a fight without the right boon support behind them.
The key mental model is that boons do not simply add up; they interact. A damage boon paired with a status boon frequently multiplies value instead of summing it, and the Duo boons that appear once two compatible gods are sharing your kit represent the biggest power spikes available. Learning to read which gods your current route can realistically offer—and bending your weapon Aspect toward those gods—is what separates a run that stalls in the Fields of Mourning from one that reaches Chronos with real momentum. Treat the boon table as your build's foundation, and the weapon as the frame you hang it on.
Keepsakes and the arc resource matter just as much as the boon itself. The keepsake you carry into the first zone biases which god you meet first, so a player hunting an Apollo-led build should equip the trinket that nudges his appearance rather than leaving the choice to chance. Likewise, the Omega moves spend a chunk of your magick on a heavier hit, and a build that cannot sustain that spend will sputter in the middle of a boss room. Plan the run so your passive resource regenerates through normal attacks between Omega casts, and the Duo boon you chased will actually fire on schedule instead of sitting unused because you rationed yourself dry.

S-Tier Gods to Chase First
The early-access god hierarchy has settled into a fairly clear shape. Apollo sits at the very top for most players because his Daze effect stops enemies from attacking for a short window after they are struck, which both protects you and sets up your own follow-ups. His attack and special boons, plus a legendary that extends Daze duration, are worth grabbing whenever they appear. Zeus remains the king of room-clearing thanks to chain lightning that bounces between clustered foes, and Hephaestus is the new arrival who brings Blast—delayed explosions that trigger after your hits land and tear through bosses with large health pools because the damage ignores the usual per-hit ceilings.
Just below them, Aphrodite's Weak status reduces the damage enemies deal and slots into almost any build, Demeter's Chill stacks provide excellent crowd control on fast-hitting weapons, and Poseidon's knockback can outclass even S-tier picks in tight rooms with walls nearby. Hestia, Hecate, and Artemis fill the middle tier—Burn is steady but slow, Hecate's Hex is niche but powerful when you build around it, and critical hits matter less here than they did in the first game. Hermes rounds out the bottom as universally helpful for speed yet rarely build-defining. Chase Apollo, Zeus, and Hephaestus when the option appears, then fill gaps with the A-tier control gods.

Duo Boons and Weapon Aspects That Synergize
Duo boons unlock when two gods' boons overlap, automatically upgrading part of your kit. Because they are scarce, the smart play is to pick a weapon Aspect that amplifies the Duo you are chasing rather than grabbing Aspects at random. Below is a paraphrased snapshot of pairings that repeatedly surface in the early-access meta.
| Weapon Aspect | Duo Boon (Gods) | What It Delivers |
|---|---|---|
| Witch's Staff — Aspect of Momus | Distance + Chill (Demeter) | A stationary chill beam that deals safe, range-scaling damage |
| Sister Blades — Aspect of Pan | Swift + Haste (Hermes) | Attack- and move-speed ceiling with dash invincibility frames |
| Moonstone Axe — Aspect of Charon | Flame Burst (Hestia) | Heavy, slow hits that ignite and heal you through Burn |
| Umbral Flames / Skull — Aspect of Moros | Flutter Strike (Aphrodite) | Close-range damage bonus applied to homing projectiles |
| Revelry Flail — Aspect of Talos | Ares & Hermes | Fast attack speed layered with damage-over-time |
The takeaway is that speed weapons reward Hermes-led Duos, heavy weapons reward Hestia or Ares pressure, and the Staff rewards planting control effects and fighting from range. Match the Aspect to the Duo, not the other way around, and you will spend fewer runs rebuilding from a mismatched kit.

Three Starter Builds Before You Reach Chronos
If you are climbing toward Chronos for the first time, three loadouts cover most playstyles. The safe opener pairs the Witch's Staff with Demeter: a distance-scaling damage boon plus a chill beam lets you plant damage during his attack windows and dodge freely, which forgives the mistakes every new player makes. The aggressive option is Sister Blades with Hermes speed boons; you stack attack and movement speed until you are effectively teleporting, then use the dash's invincibility frames to chain through his phase-two time circles. The durable option is the Moonstone Axe with Hestia—slow, heavy hits that Burn enemies and heal you through the damage-over-time, so a missed dodge costs far less than it would on a glass-cannon build.
Whichever you choose, remember that the final boss's vitality gates your progress: chip his health down before committing to long posture-style exchanges, and keep one defensive boon such as Athena's deflect or Aphrodite's Weak in reserve so a missed dodge does not end the run. Adapt the Aspects to the gods you actually meet rather than forcing a plan, and let the Duo boons—not the weapon—dictate your finisher. The players who clear Chronos fastest are the ones who treated boon synergy as the build and the weapon as a delivery system.
One more habit separates clean clears from forty-seven deaths: never overcommit after a stagger. When Chronos recoils, land two or three hits and then reset to a defensive stance, because his recovery attacks punish greed harder than any normal swing. Save your most expensive Omega for the windows when he is locked in a long animation, not when he is free to turn, and your effective damage per minute will climb even though your raw numbers look identical. Pair that discipline with the distance-control boons above and the final god stops feeling like a wall and starts feeling like the last room of a build you finally understood.
Choosing Doors by What the Run Still Needs
Most rooms pay out in one of a few currencies: another god's attention, a weapon upgrade, immediate survival resources, or raw economy. Newer players take whichever icon looks largest. A stronger habit is to name the one thing your run lacks before you commit, then take whatever offers it. If you are one god short of your intended pairing, a filler boon from that god beats a strong boon from someone you have no plan for. If your combination is already online and your output feels fine, the weapon upgrade is usually correct, because it changes how every future hit behaves.
The hidden cost to watch is dilution. The pool of gods competing for your later rooms is limited, so every extra god you accept makes it less likely that the one you actually wanted appears again with a rarity bump, a second choice, or the other half of your pairing. Treat an unwanted god as a real expense rather than a freebie, and learn that refusing a door is sometimes the highest-value move available.
| State of the run | Take this | Decline this |
|---|---|---|
| Missing the second god in your intended pair | Any door from that god, even filler | A new god with no roadmap |
| Core combination already online | An upgrade for the move you press most | Flat damage from a god you cannot level |
| Low on health, no defensive layer | Health, healing, or mitigation | Economy doors |
| Heavy attacks unsustainable by the second zone | Resource capacity and regeneration | Upgrades that make spending heavier |
| None of the above applies | The shortest, least committing option | Anything that widens your god pool |
Levels, Rarity, and Where Upgrades Actually Belong
An upgrade point is not generic power you can spend blindly. The practical question is frequency: an effect that triggers on every hit gains far more from levelling than one that triggers once per encounter, even when the listed percentage looks similar. Put your first few levels into whichever input you physically press most, then into whatever applies to every target rather than only to the first one hit. Defensive and utility options usually reach their useful point quickly and are poor sinks beyond that.
Rarity matters more than most players assume. Accepting a higher-rarity version of a central ability does two things at once: it starts stronger and tends to gain more per level afterward, so the same number of future points produces a larger ceiling. When a room offers a rarer replacement for something core, consider taking it even if the immediate numbers look lateral, then redirect future points into the new copy. Spreading upgrades evenly across four abilities is usually the weakest pattern, because nothing reaches the range where it carries a room; concentrate until one thing clearly dominates, then move to the second. The useful exception is a status effect that needs one more level to exceed the window where it actually protects you, which is worth more than a fifth point in your main damage source.
Weapon Upgrades Should Multiply, Not Redirect
Upgrades are the largest single swing available inside a run and also the most common source of self-sabotage. The failure is rarely that the offered option is weak; it is that it quietly moves your power to a different button than the one you built around. An upgrade that supercharges your special while every boon you own sits on your attack leaves you pressing the weaker input all night. Read each option as a question about which of your existing actions it pays for, and pick the answer matching your habits.
The second filter is animation cost. Anything adding wind-up or lengthening commitment is a liability against enemies that punish recovery frames, even when the numbers look appealing. Pair that with the resource question: a class of upgrades makes your strongest attack stronger and hungrier simultaneously, which silently removes that tool from every fight after the first minute unless regeneration backs it up.
Failure States That End Otherwise-Strong Runs
| Failure mode | Why it happens | The fix |
|---|---|---|
| You clear every room but reach the boss with almost nothing left | Health was spent as a currency in optional encounters | Give up optional chambers when ahead and treat the pre-boss recovery stop as mandatory route planning |
| Your strongest attack becomes unusable halfway through | No regeneration source behind rising resource costs | Secure regeneration from ordinary attacks before cost-increasing upgrades |
| Room clearing feels great, bosses take forever | Your output is spread across many targets instead of concentrated | Keep one concentrated single-target layer and one spread layer, never two of the same kind |
| The intended pairing never appeared though both gods were present | Pairings usually need a specific slot you filled with something else | Learn which slot unlocks it, leave that slot open while holding the companion god, and lean on the god-biasing trinket through that zone |
A self-check worth running after any substantial change: pick one enemy type you reliably lose health to and run ten clean encounters against it while counting every hit taken. If the count improves while your clear pace stays flat, the change was real. If it only improves against weaker enemies, you have not actually improved, and that is the trap most players fall into when chasing a headline boon.
Run the same count again after switching weapon aspects, because the number you are really measuring is how well you move with that weapon rather than how strong the loadout is. It is also worth comparing two runs built around the same intended pairing but different secondary gods. When boss timings look similar and your hit counts look very different, the gods did the work and your positioning was the variable, which points directly at what to practise next.
🔥 Topics
Genshin Impact Team Composition: Elements, Resonance, and Role Coverage
Next →LoL Jungle Pathing: Routes, Invades, and Reading the Enemy Jungler