 Sandbox
Minecraft: Ten Ways to Survive Your First Night
The Ten-Minute Clock — Why Day One Is a Race
When you spawn into a fresh Survival world, the sun is already falling. You have roughly ten minutes of daylight before hostile mobs begin spawning at dusk, and almost every beginner death happens in that first scramble. The mistake most new players make is treating Minecraft like a building toy on day one. It is not. Day one is a timed resource race: gather the right materials, convert them into the right tools, and get behind a closed door before the light fades.
Think of the first day as a production line with a hard deadline. The order matters. If you waste the first five minutes decorating or exploring, you will be outside with no weapon when the first zombie arrives. This guide walks through ten concrete ways to make sure that never happens, from your first punched tree to the moment you close your eyes in a bed.
Step One: Wood Is Everything
Your entire first-day economy starts with a tree. Walk up to any trunk and hold the attack button to punch it — logs pop out and drop at your feet. Collect at least eight to twelve logs before you do anything else; wood is the only resource you can absolutely rely on finding, and you will burn through it fast.
Open your inventory and turn logs into planks (four planks per log), then craft a crafting table from four planks. The crafting table is the single most important block you will make all day, because it unlocks every other recipe. While you are there, turn two planks into sticks — you need them for tools and torches.
Now make a wooden pickaxe and stop. Do not waste time crafting a full set of wooden tools. Wooden tools are slow and break almost immediately, so they are a stepping stone, not a destination. The pickaxe is the one wooden tool worth making because it lets you reach stone, and stone is what actually keeps you alive.
Step Two: Stone Tools Before Dark
Use the wooden pickaxe to mine cobblestone — dig into a hillside or any exposed stone and grab at least twenty blocks. Then immediately upgrade: craft a stone pickaxe, a stone sword, and (if you have time) a stone axe. Stone tools are dramatically faster and far more durable than wood, and the stone sword is the difference between winning a fight and fleeing one.
With stone in hand you can also build a furnace using eight cobblestone arranged in a ring. The furnace is your food cooker, your ore smelter, and your charcoal factory all in one. If you found iron ore while digging, smelt it now — iron tools and a shield are a massive early upgrade. If you found no coal, that is fine: place a log in the furnace with another log as fuel and it produces charcoal, which works exactly like coal for making torches.
Step Three: Build a Shelter You Can Seal
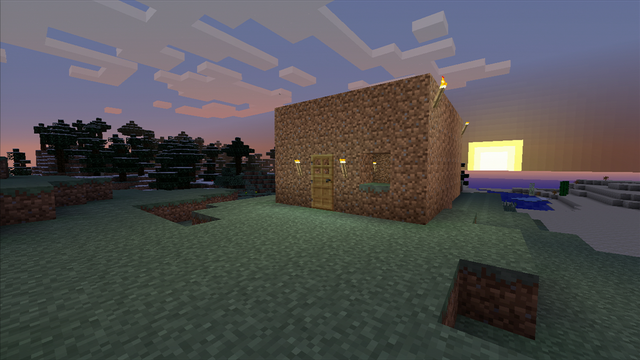
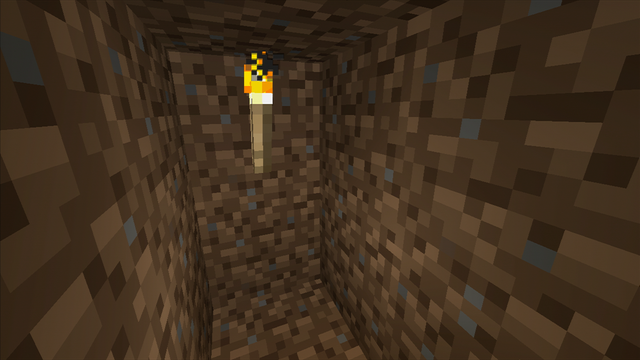
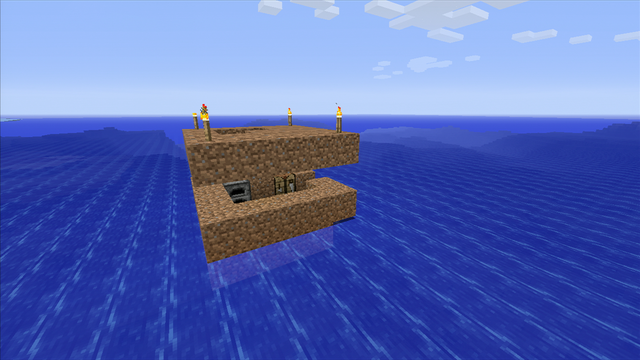
Before the sun sets, you need walls. The fastest safe base is a hole dug horizontally into a dirt or stone hillside: carve out a small room, drop a door in the entrance, and you are protected. If the terrain is flat, a tiny wooden box of any shape works just as well. The only rule that matters is that every opening is closed. Mobs cannot walk through walls, but they will pour through a missing door or an open hole you forgot about.
Resist the urge to build a mansion. A beginner trap is spending the whole first day on a beautiful house that is still unfinished when night falls, leaving you exposed. A three-by-three dirt hut with a door keeps you alive just as well as a castle, and you can build properly on day two. If you spawned near a village, repairing or claiming an existing house is even faster — just make sure the windows and doors are sealed.
Step Four: Light It Up and Make a Bed
Darkness is what kills you, literally. Hostile mobs spawn in any area at light level zero, so a shelter that is dark inside becomes a mob factory of its own. Craft torches with one coal (or charcoal) plus one stick to make four torches, then place them on the walls inside and around your entrance. If you have been mining copper, the 1.21 update cycle added copper torches that glow slightly warmer but work identically — a cosmetic upgrade, not a mechanical one.
A bed is the cleanest way to end the night. The recipe is three wool plus three planks placed in a row, and you get wool by killing two or three sheep. Sleeping in a bed does two things: it skips the night entirely and it sets your respawn point, so if you die later you return to your base instead of the original world spawn. Place the bed inside your lit shelter and sleep the moment the option appears. One hidden gotcha: if your bed is destroyed or blocked while you are away, your spawn resets to the world origin, so keep it intact.
Step Five: Food, Shields, and Surviving the Dark
Your hunger bar drains as you sprint, jump, and fight, and on Normal difficulty it starts costing you health once it empties. Cooked meat restores far more than raw: a cooked porkchop or steak returns a generous chunk of hunger, while bread (three wheat) and baked potatoes are easy renewable options. Never eat raw chicken unless desperate — it has a chance to poison you, which drains hunger even faster. Keep a stack of food in your hotbar before you do anything risky.
A shield (six planks plus one iron ingot) blocks incoming melee and arrows completely when raised, making it the best early defense against skeletons and zombies. If you have no iron yet, simply do not fight — close the door and let daylight solve the problem. Learn the mobs: zombies are slow and easy to kite, skeletons shoot arrows and die if you close the distance, creepers explode and must be sprinted away from the instant you hear the hiss, and endermen only attack if you look at their face. In the Pale Garden biome a Creaking will hunt you, but it freezes when you look directly at it — never turn your back, and destroy the Creaking Heart block to end it.
Ten Rules That Keep You Alive
Keep these ten rules in front of you on day one:
- Punch trees first — collect 8 to 12 logs before anything else.
- Make a crafting table and sticks before tools.
- Upgrade to stone tools fast; skip the full wooden set.
- Build a furnace and know you can make charcoal without coal.
- Gather food — aim for 8 to 12 cooked items.
- Light the entire shelter with torches; darkness spawns mobs.
- Craft a bed from wool and planks to skip the night and set spawn.
- Never dig straight down — use stairs so you do not fall into lava or a ravine.
- Do not fight at night without a shield; retreat is free.
- Mark your base or write down coordinates so you can always find home.
A few final numbers worth remembering: iron ore appears between roughly Y-level 16 and 64, and once you are ready for diamonds you will want to dig near Y-level -59 in version 1.18 and later. For now, your only job is to see the second sunrise. Do that, and the rest of the sandbox opens up.
Making Your Base Actually Spawn-Proof
Torches inside a hut are survival; torches arranged so nothing can spawn anywhere near it are security. The difference matters the moment you start farming, breeding, or running at night with a door that opens outward.
Mobs require darkness to spawn, so the first layer is light: keep the entire floor space lit, including corners and the flat roof. The second and more reliable layer is making the surface unspawnable. Mobs need a solid full block to appear on, which means any surface that is not a complete opaque cube blocks spawning permanently, regardless of light level.
| Surface | Can mobs spawn? | Practical use |
|---|---|---|
| Solid full block in darkness | Yes | Only acceptable if lit |
| Bottom-half slab | No | Ideal for paths, roofs, and large outdoor areas |
| Carpet | No | Cheap way to spawn-proof a floor without raising its surface |
| Glass | No | Lets you build bright rooms without light sources |
| Stairs (upside-down or normal) | No, but beware of adjacent full blocks | Fine for decoration and steps |
| Water | No | Natural perimeter for certain builds |
Roofs catch people out constantly. A flat roof that is pitch dark will manufacture hostiles above your head, and some of them will walk off the edge into your courtyard. Slab it, or light it, or both.
There is also a distance component worth knowing: hostile mobs do not spawn immediately next to you, so a well-torched bubble of ground around your base genuinely keeps you safe, while a torch line twenty blocks past that will not stop anything arriving from further out. The reverse is the annoying one — mobs can despawn or move based on distance, so if you walk away far enough, pressure resets. Use that intentionally: leaving the immediate area briefly and returning clears stragglers that would otherwise accumulate.
Test your work at night. Wait for full dark, stand in your base, and look at the ground around you. Whatever you forgot to lit up will announce itself within a minute.
Threats the Ten Rules Don't Cover
The obvious dangers are slow zombies and shooting skeletons. The ones that actually end runs behave differently enough to deserve their own counters.
| Threat | Why it kills you | The specific counter |
|---|---|---|
| Spiders | Climb vertical walls, so any roof or wall you assume protects you does not | Add an overhang lip around walls, or build with a ledge that breaks their climb path |
| Baby zombies | Far faster than adults and can fit through gaps you thought were sealed | Check every gap is truly blocked, and do not fight them in the open without a shield |
| Drowned | Attack from range underwater where your melee reach barely matters | Avoid night swimming entirely; if you must cross, bridge or boat rather than swim |
| Phantoms | Appear after consecutive sleepless nights and attack from above while you work | Sleep regularly, even briefly, and never ignore the warning signs of going days without rest |
| Suffocation in blocks | Returning to a base whose entrance tunnel you extended inward can trap you | Always add blocks outward when sealing rather than inward |
Creepers deserve one extra note beyond running away: their blast reshapes terrain, and if it detonates near your base it removes blocks you were relying on for safety. That means the real cost of a creeper hit is not the damage you take — it is the hole you now have to repair before the next night.
Skeletons are more exploitable than they feel. They consistently miss moving targets, so sidestepping while you close the distance is far safer than walking in a straight line. Once you are in melee range their accuracy stops mattering entirely.
Night-Two Rules for Going Underground
Caving is where most second nights end, and it fails for the same reason every time: players descend without a return plan. Before you take a single step down, establish three things — a lit path back, a way to mark direction, and a water source in your hotbar.
Place torches consistently on one side of your tunnel only. That single habit means you can always identify which way leads out, because running with torches on your left is home and torches on your right is deeper. Combined with lighting, direction disputes disappear even hours later.
Never mine the block you are standing on or directly above you. Water pockets hide above tunnel ceilings and lava sits right below countless floors; both are lethal and both are entirely avoidable by mining at your own level first and listening. Gravel behaves similarly — it collapses when the block beneath it changes, which can bury you on a staircase.
When you hear running water or hostile noises, do not dig toward them blindly. Instead, place a water bucket before breaking through any unknown wall, so accidental lava becomes harmless immediately. The water source also doubles as your emergency fall break, since landing in placed water removes fall damage entirely.
Finally, keep your return route short and vertical to a known landmark. Caving rewards patience: ten minutes deeper with a lit, marked path is worth far more than thirty minutes of panic in the dark carrying a full inventory of iron you will lose anyway.
Failure Recovery: What To Do When Plan A Collapses
Every plan eventually breaks, so having a rehearsed recovery is what separates players who reach day ten from players who restart worlds every evening.
No wool for a bed is the classic one. Wool can also be crafted from string, which spiders drop, so a night spent killing spiders near a lit area still gets you a bed provided you have planks. If that is impossible, the fallback is a sealed hideout rather than a house: dig a short tunnel, place blocks in the entrance, stay still, and wait. Darkness inside is uncomfortable but harmless if it is only one block wide and you are not wandering.
Dying away from home is the second. Dropped items vanish after a set period, and the clock starts immediately, but the timer only counts while the area you died in is loaded. Sprint back with nothing equipped rather than re-gearing slowly, and prioritise recovering whatever is irreplaceable rather than everything.
Losing your base to a blast is third. Repairs at night are usually a mistake — the noise attracts more attention and a partially repaired wall is worse than no wall because it gives you false confidence. Seal the breach with whatever is in your inventory, then wait for daylight and repair properly.
The general decision rule is simple: if the fix requires standing outside after dark, it can wait until sunrise. Almost nothing in this game punishes patience, and almost everything punishes one more block placed in the dark.
🔥 Topics
Overwatch 2 Heroes: A 51-Hero Roster Across Three Roles
Next →Elden Ring Walkthrough: A Safe Opening Route to Stormveil
More “Minecraft” Content
 Sandbox
Minecraft: Cobblemon (Pokémon Reforged) Mod — Getting Started
New to the Cobblemon (Pokémon Reforged) mod for Minecraft? Here's how to install it, pick a starter, and master the basics of catching and battling your favorite Pokémon.
 Sandbox
Minecraft Redstone Basics: Repeaters, Comparators, and Your First Auto Door
Redstone stops being mysterious once you track two numbers: signal strength, which decays by one every block of dust, and time, which is counted in ticks. This guide explains both properly and then walks you through three builds you can finish tonight and actually reason about: a hidden sticky-piston door, a comparator item filter that triggers on the second item, and a latch you can debug instead of copying.
 Sandbox
Minecraft Modpack Picks: One Each for Tech, Magic and Adventure
A 2026 buyer's guide to Minecraft modpacks: one strong pick each for tech, magic, and adventure, plus hardcore and lightweight options matched to your RAM and your group's style.