 Anime / Gacha
Wuthering Waves Beginner Roadmap: Union Level, Echoes and Your First Team
Rule One: Push Union Level First
If you remember nothing else from this guide, remember this: Union Level is the gate that opens almost everything in Wuthering Waves. It controls when you unlock higher Data Bank tiers, which in turn decide the rarity and cost of the Echoes that drop from defeated enemies. It also gates the free 5-star weapon box you earn at Union Level 45. Progressing the main story is the fastest way to raise Union Level, so your first sessions should be an unlock rush, not a power grind.
Until around Union Level 30 the story hands out huge rewards, often 200 to 500 Astrite per chapter. Exploration and region quests add more. Do not get distracted farming Echoes this early; the best drops only appear once your Data Bank tier climbs, and 4-cost Echoes do not unlock until about Union Level 27. Build the account skeleton first, then the gear.
The Beginner Banner Is Free Value
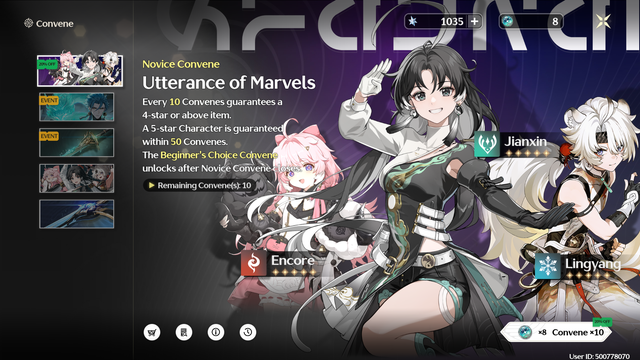
As soon as you hit the right story milestone you unlock the discounted beginner Convene, and you should finish it early rather than saving it. The first 50 pulls on this banner cost 20 percent less, at 8 Tides each instead of the usual 10, and you are guaranteed a 5-star standard Resonator within those 50 pulls. The pool includes strong picks like Verina, Encore, Calcharo, Jiyan, Lingyang, and Jianxin. Verina is the best outcome because she is the strongest free-support option in the game, but any 5-star here is a win.
There is also a separate New Voyage Companions-style selector some accounts receive, letting you lock in one limited 5-star from a small roster with a 160-pull guarantee and a 31-day window. Treat that as a real deadline and decide before it expires.
Your Free Team: No Gacha Required
Wuthering Waves is generous with free Resonators, and you can clear all story content without a single limited pull. The core free cast includes:
- Rover: your avatar, earned through story. The Havoc form unlocks after Chapter 1 and is a genuine main-DPS option usable into endgame.
- Sanhua: a 4-star Glacio sword user, one of the best budget supports because she builds Concerto Energy faster than almost anyone, feeding your swaps.
- Baizhi: a 4-star Spectro healer with team-wide healing and an Outro buff, obtainable from the beginner banner or standard pool.
- Encore: a standard 5-star Fusion DPS whose basic-attack burst rivals limited units.
- Verina: the premier free-support healer, best pulled from the beginner banner.
Two fully workable starter teams are Rover-Havoc plus Sanhua plus Baizhi (the all-free path), or Encore plus Sanhua plus Verina (built around the beginner-banner 5-star). Sanhua is the glue in both, so build her first no matter which carry you choose.
Echo Basics: The Gear System
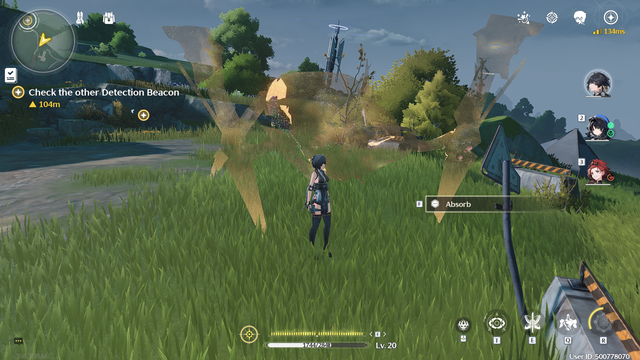
Echoes replace the artifact system from other gacha games, and they are where most new players quietly waste resources. You equip five Echoes per character, each carrying a cost of 4, 3, or 1. The standard beginner spread is 4-3-3-1-1: one 4-cost main Echo, two 3-cost pieces, and two 1-cost pieces. Each Echo also belongs to a Sonata set; two pieces give a flat bonus and five pieces unlock the full build-defining effect.
The crucial combat link is Concerto Energy. As you attack, use skills, and trigger Echo abilities, your Concerto gauge fills. When it hits 100 you swap out to fire that character's Outro Skill, which buffs the character swapping in. That incoming character then plays an Intro Skill already amplified. This swap is the heart of every rotation, so choose Echo main stats and Sonata sets that support your carry's damage type rather than randomly stacking rarity.
Spend Waveplate Every Day After Union Level 30
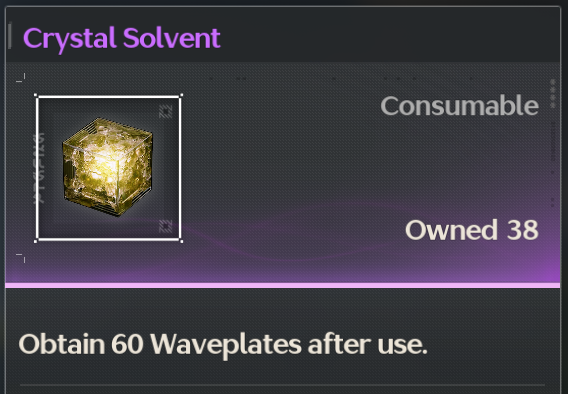
Waveplate is the game's stamina, and it stops accumulating once the bar is full. From Union Level 30 onward, log in daily and spend it on Tacet Fields or resource nodes before it overflows. Each day of wasted Waveplate is a day of slower Echo and material progress that you never get back.
Before Union Level 30 you mostly spend Waveplate on early ascent materials, but the real farming begins once 4-cost Echoes unlock. Use the in-game Echo recommendation and an Echo scorer-style check before investing a piece past plus 10, because tuning the wrong Echo burns rare tuners.
Save Astrite for One Limited DPS and a Support Rerun
Astrite is the premium currency and converts to pulls at 160 per Tide. A consistent free-to-play player who does dailies, clears the two endgame modes, and finishes events can save roughly enough for one guaranteed 5-star every patch or two. The disciplined plan is to bank that Astrite for a single limited DPS you like, then use a later rerun window to grab a limited support who completes the team.
Keep weapon pulls last. Like in other gachas, a signature weapon is a smaller percentage gain than a second team member, and the weapon banner, while more forgiving here than elsewhere, still competes for the same Astrite. Build characters before stat sticks.
A 30-Day Starter Checklist
- Days 1 to 3: finish tutorial, claim the beginner banner discount, pull your guaranteed 5-star, redeem the welcome codes.
- Days 4 to 7: raise Union Level through the main story; do not pull limited banners yet.
- Days 7 to 14: push toward Union Level 30, open the map, and start the Data Bank.
- Days 14 to 21: at Union Level 27 plus, begin building one DPS with a proper 4-3-3-1-1 Echo set.
- Days 21 to 30: attempt the first endgame tower with one main DPS, one support, and one healer, all at level 60 or higher with full Sonata sets.
Follow this arc and your account will be solvent, your team functional, and your Astrite aimed at the one limited unit worth chasing.
What to Redeem and What to Skip
A few freebies reshape your early game, so do not let them expire. Redeem the welcome code (such as the classic WUTHERINGGIFT-style bundle) the moment you reach the level gate, because it hands over Astrite, tuners, and basic upgrade materials. Visit the in-game shop and spend your monthly Coral-style currencies on extra Tides or wavebands only after you know your next target; do not burn them on random items. Avoid the common trap of converting Astrite into standard Lustrous Tides just to roll the permanent banner, since the game already drips those pulls through progression, events, and the tower. Skip leveling five characters at once, because experience books run dry fast; commit to one carry, then its two supports. Finally, ignore the weapon banner until your first real team is built. Following these small rules keeps your Astrite pointed at the one limited DPS and one support rerun that actually move your account forward.
Echo Main Stats by Cost Slot, and the Tuning Trap
Once you know the 4-3-3-1-1 shape, the next decision is which main stat each slot should roll. Cost determines what a slot can offer, and the priorities are stable enough to memorise.
| Cost slot | Priority main stat | Acceptable early substitute |
|---|---|---|
| 4-cost (main echo) | Crit Rate or Crit DMG, chosen to balance the two against each other | Element damage or ATK% while you are still assembling the set |
| 3-cost (two pieces) | Element damage matching the carry's element | ATK% for a carry; Energy Regen for a support who needs their Liberation every rotation |
| 1-cost (two pieces) | ATK% | Flat ATK or HP% as a placeholder only |
The balancing act on the 4-cost piece is what beginners get wrong. Crit Rate and Crit DMG scale off each other, so stacking one while the other stays low wastes most of its value; check the character's total crit rate before choosing, and take whichever stat brings the two closer to a balanced ratio. Substats follow the same logic — crit, ATK%, and the damage-type bonus your carry actually uses are worth keeping, while rolls into flat defensive stats are a reason to stop investing.
The tuning trap is investing before you have seen the rolls. Levelling consumes scarce tuners and echo experience, and while recycling a levelled piece returns a portion of what you spent, it is never all of it. Level candidates in stages and check the result at each checkpoint: if the first few rolls land in stats you do not want, abandon the piece immediately and move the resources to a fresh one. Abandoning at the first checkpoint is cheap; abandoning at maximum level is one of the most expensive mistakes available to a new account.
Rotation Uptime and the Two-Minute Self-Check
A rotation is only as strong as its slowest loop. The pattern everyone learns first is: build Concerto on a support, swap out to fire the Outro buff, bring in the carry, unload, then repeat. What breaks it is rarely damage — it is waiting. Either the carry's Liberation is not ready when the window opens, or the buff expires before the biggest hits land.
Run this check on a boss or a training dummy. Set a two-minute timer and run your normal rotation continuously. Every time you reach the carry's window and the Liberation is not available, or you finish a combo after the buff has already fallen off, note it. Two or more of those in two minutes means the loop is not sustainable and you are filling the gaps with weak filler attacks that add almost nothing to your clear time.
The fixes are ordered by cost. First, shorten the filler: if a support has to basic-attack through a long animation to top up Concerto, that is dead time you can remove by swapping earlier or by using a character who fills the gauge quickly. Second, add Energy Regen — through substats, a 3-cost main stat, or a weapon with regeneration — until the Liberation is ready on every pass. Third, front-load the damage: put the carry's heaviest hits immediately after the swap so the buffed window covers them, rather than opening with setup abilities that burn seconds of the buff.
Re-run the same two-minute test after each change. The target is a loop with no dead air, and it is measurable: count the gaps, not the damage numbers.
Quickswap Fundamentals: Fitting Damage Into the Window
There are two broad ways to build a team, and confusing them is why some accounts feel weak despite decent gear. A hypercarry team gives one character long field time and uses the others purely to set up and buff. A quickswap team keeps swapping, using each character for a short burst of skills and leaving before their animations drag.
Quickswap works because many skills keep resolving for a moment after you leave, and because swapping cancels the recovery frames at the end of a long animation. Done well, it compresses three characters' worth of damage into the duration of a single buff window. Done badly, it cancels the skill before the hit lands and you deal nothing at all.
| Situation | Hypercarry | Quickswap |
|---|---|---|
| One character is far better geared than the rest | Yes | No |
| Several characters have strong, short-cooldown skills | No | Yes |
| You are still learning the game | Yes | No |
| Carry damage is concentrated in one long combo | Yes | No |
| You need to fit damage inside a short buff window | No | Yes |
Learn the safe swap point for each skill rather than mashing the swap button. Every skill has a moment where the hit has registered and the rest of the animation is pure recovery — swapping before that point cancels the damage, and swapping much later wastes the time you were trying to save. Practise it as a fixed sequence: pick two characters, run the same short loop ten times in the training area, and count how many loops finish without a cancelled skill or a pause. When the count is clean, take that exact sequence into the tower rather than inventing a new one mid-fight.
A Weekly Resource Budget: What to Farm First
Waveplate is the same scarce currency every day, so the question is never whether to spend it but what to spend it on. The ordering principle is certainty: spend on upgrades that are guaranteed to pay off before you spend on rolls that might.
| Farm | What it gives | When to prioritise |
|---|---|---|
| Resonator ascension materials | Unlocks level caps | Whenever a character is stuck at a cap; always first |
| Skill and talent materials | Direct, predictable damage increase | Steady and ongoing, for your three main characters only |
| Weapon ascension materials | Weapon level and base stats | After talents, and only on the carry's weapon |
| Echo experience and tuners | Levelling and tuning pieces | Ongoing, but never ahead of ascension |
| Set-piece farming | Sonata pieces and substat rolls | Once your Data Bank tier is high enough that good drops are actually possible |
The most expensive mistake in that list is the last one, done too early. Farming Echo sets before your Data Bank has climbed means the drops are capped at lower rarity and the pieces you level are ones you will replace within days. Hold the heavy Echo farming until the tier is up and spend the interim on ascension and talent materials, which never become obsolete.
The second mistake is spreading the budget across five characters. Talent materials are the deepest sink in the game, and three characters with raised talents beat five with low ones in every piece of content. Pick the carry and its two supports and let everything else wait until the first team is finished.
🔥 Topics
VALORANT: Climbing Out of Silver — Crosshair, Sensitivity and Mindset
Next →Elden Ring: Where to Find Every Ancient Dragon Smithing Stone
More “Wuthering Waves” Content
 Anime / Gacha
Wuthering Waves: Dania — Should You Pull, and How to Build Her
Dania is a T0 dual-form Fusion sub-DPS who anchors both the Fusion Burst and Tune Strain archetypes. Here is whether she is worth your Astrite, and the weapon, Echo, and rotation setup that gets her online fast.